Documentation
Welcome to the documentation for the Google Assistant Smart Home Action Node-RED node.
Create Account
Before starting you will need to create an account, if you have not yet done this you can do this here.
You can now create your first device using the wizard to pick the type and traits you need.
When you create the account please use a real email address. This address will only ever be used to allow you to reset your password and to send you messages about the state of the service.
Create Devices
Once you have an account you can start creating devices to expose to the Goolge Assistant.
Device Types:
- Light
- Switch
- Outlet
- Blind
- Door
- Thermostat
- Fan
- Heater
- Pureifier
- Scene
- Camera
- Sensor
Traits:
- OnOff
- Brightness
- ColorSetting
- FanSpeed
- TemperatureSetting
- OpenClose
- CameraStream
There are some extras in the lists in the wizard for creating devices that are disabled, they are there while I work out a good way to expose their triats so they can be easily configured.
Link Account
Now you have and account you can enable action in the Google Home app and link the account you've just created.
-
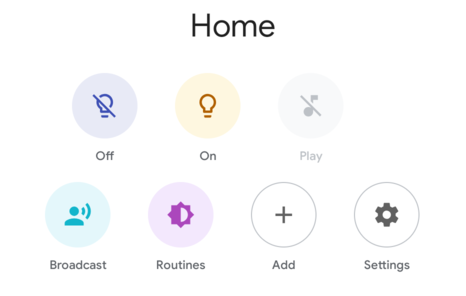
First click the "Add" button.
-

Then "Set up device"
-
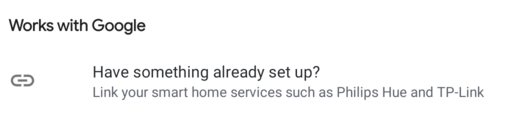
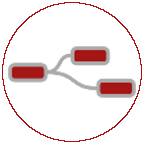
And next select "Works with Google" and then finally find "NR-GAB" in the list with the following icon.
-
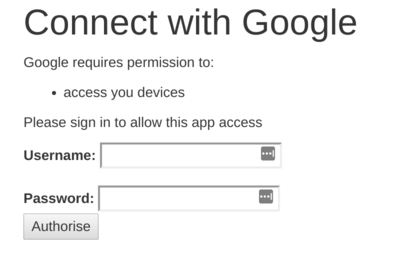
Finally sign in with the username and password you created earlier.
Install Nodes
There are 2 ways to install the required Node-RED nodes.
- First using the pallet manger
Search for node-red-contrib-googlehome
- Second on the command line
Make sure you are in the Node-RED userDir (normally ~/.node-red) and then run
npm install node-red-contrib-googlehome
Building Flows
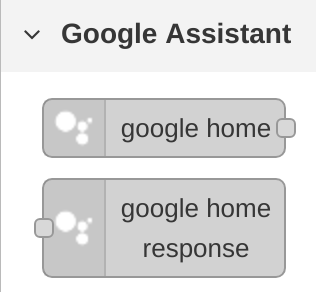
There are 2 nodes available in the pallet, google home and google home response. For most situations you can get away with using the google home as this is the node that output the commands when you ask Google Assistant to do something.
Configure Nodes
When you drag the first Google Home node on to the canvas you will need to create a config node. To do this, click on the pencil icon next to the first input. This will open a new dialog, where you can enter the same username/password from the first step and hit the "Add" button. For all subsequent nodes you should just pick the entry from the drop down that matches your username.
Once you have picked the right config node, after a second or so the list of devices should be populated. If you have recently created or deleted a new device then you can hit the refresh button to the right of the drop down and the node will update it's list from the service.

To start with you should leave the Auto Acknowledge box ticked. This will assume that any incoming command has succeed and report that back to the Google Homegraph1.
The Google Home node will output a message object that looks like the following when a command arrives:
{
  topic: "",
  name: "Light"
  raw: {},
  payload: {
    command: "action.devices.commands.OnOff",
    params: {
      on: true
    }
  }
}
The msg.payload.command value will be one of the commands identified in the
traits identifiers from the
Google Smart Home Action API. The msg.payload.params will hold the settings to be updated
on the device.
Example messages from the supported traits (click on trait name to expand):
- OnOff
{ topic: "", name: "Light" raw: {}, payload: { command: "action.devices.commands.OnOff", params: { on: true } } } - Brightness
{ topic: "", name: "Light" raw: {}, payload: { command: "action.devices.commands.BrightnessAbsolute", params: { brightness: 30 } } } - ColorSetting
Colours in RGB
{
  topic: "",
  name: "Light"
  raw: {},
  payload: {
    command: "action.devices.commands.ColorAbsolute",
    params: {
      "color": {
       	"name": "magenta",
        "spectrumRGB": 16711935
      }
    }
  }
}
The spectrumRGB value is the interger representation of the RGB value in hex. If you convert it to Hex and front pad it with 0 so it's 6 digits long. The first 2 digits will be the Red value, the middle 2 digits will be Green and the last 2 digits are Blue.
Colour Temperature in K
{ topic: "", name: "Light" raw: {}, payload: { command: "action.devices.commands.ColorAbsolute", params: { "color": { "name": "warm white", "temperature": 4000 } } } } - FanSpeed
Fans currently support 3 speeds (and currently only in English & Brazilian Portugues, if you want to supply translations please open an issue on Github)
- Low
- Medium
- High
{ topic: "", name: "Fan", raw: {}, payload: { "command": "action.devices.commands.SetFanSpeed", "params": { "fanSpeed": "Low" } } } - TemperatureSetting
The TemperatureSettings currently supports the following modes on,off,heat,cool (more modes to come later). When you request a mode change the message will look like this:
{
  topic: "",
  name: "Thermostat",
  raw: {},
  payload: {
    "command": "action.devices.commands.ThermostatSetMode"
    "params": {
      "thermostatMode": "cool"
    }
  }
}
When you set the Thermostat set point you get the following message. All values must be in Degrees C.
{ topic: "", name: "Thermostat", raw: {}, payload: { "command": "action.devices.commands.ThermostatTemperatureSetpoint" "params": { "thermostatTemperatureSetpoint": 15 } } } - OpenClose
Open/Close behaves in 2 different ways depending if the device is a Door or Blinds
Door
Doors can currently only be open or closed so will request 0% for closed and 100% for open
{
  topic: "",
  name: "Door",
  raw: {},
  payload: {
    "command": "action.devices.commands.OpenClose"
    "params": {
      "openPercent": 100
    }
  }
}
Blinds
Blinds can be partially open or closed. At the moment the only supported direction is UP
{ topic: "", name: "Blinds", raw: {}, payload: { "command": "action.devices.commands.OpenClose" "params": { "openPercent": 50, "openDirection": "UP" } } } - CameraStream
CameraStream requests a URL for either a HLS or DASH video stream.
{
  topic: "",
  name: "Camera",
  raw: {},
  payload: {
    "command": "action.devices.commands.GetCameraStream"
    "params": {
      "StreamToChromecast":true,
      "SupportedStreamProtocols":[
        "progressive_mp4",
        "hls",
        "dash",
        "smooth_stream"
      ]
    }
  }
}
This request requires a response node, Auto Acknowlege will not work. The response should look like the following:
{
  topic: "",
  name: "Camera",
  raw: {},
  payload: {
    "command": "action.devices.commands.GetCameraStream"
    "params": {
      "cameraStreamAccessUrl": "http://192.168.1.96:8080/hls/stream.m3u8",
      "cameraStreamProtocol": "hls"
    }
  }
}
More traits and configuration options for traits when I get time to work out how to nicely expose them.
Sending a response
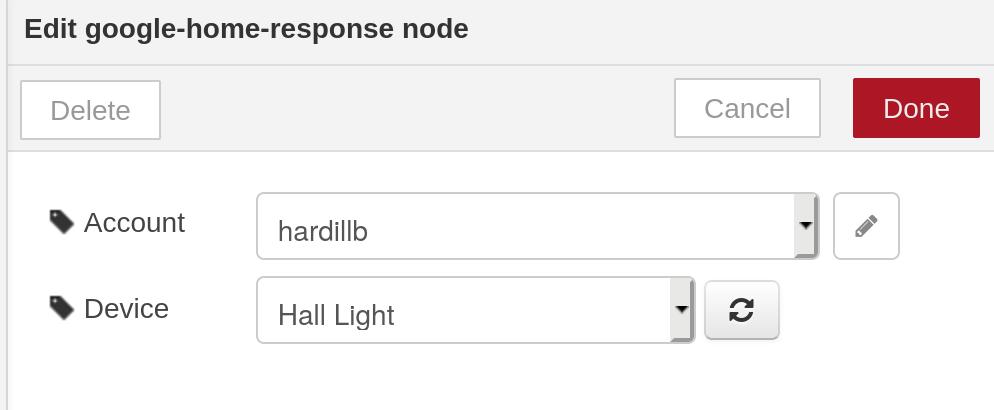
If you are triggering an action that may fail, then you can untick the Auto Acknowledge box. When you do this you will have to terminate the flow with a Google Home Response node.
You need to configure the response node to point to the same device as the input node it is connected to by selecting the account name and device name from the dropdowns provided.
If you are going to handle your own response, it needs to be sent in less than 3 seconds from the arriving event otherwise the backend will assume a failure and respond accordingly.
This node takes the same msg.payload format as output by the input node. The
msg.payload.params should be updated to match the new state of the device.
To signify a failure set msg.status to false
Updating Google Homegraph state without a command
Google Assistant keeps track of the state of all devices to allow it to keep the GUI in the App or on devices with screens up to date. This informaton is kept in something called the Homegraph.
If you are updating the device state without using Google Assistant you can can update the Homegraph using the Google Home Response node.
Please only send status updates when the state changes, if needed an RBE node can be used to filter updates.

In the case above the light is turned on, and the state sent back to the Home Graph, but 5 mins later the trigger node turns the light back off and updates the Home Graph again with out the need for a new input message.
If you are going to use the trigger node as in the example above, you need to remove the
msg._confId. The flow that matches the image above can be found here
Sensors
When using the Sensor device type, these can only be used as an output
Currently the Sensor supports 2 value types
- Temperature (must be in celsius)
- Humidity Percentage (must me an integer)
These can be updated independly or as a pair, the input msg should look something like
{
  topic: "",
  payload: {
    params: {
        temperatureAmbientCelsius: temp,
        humidityAmbientPercent: Math.round(humidity)
    }
  }
}
As with all interactions the input temperature must be in Centegrade even if the output will be displayed in Fahrenheit. Unlike the Thermostat device, the humidity must be an integer value, if you try to send a decimal value it will be ignored
Thermostat
The Thermostat device can also show the current ambient temperature and humidity these are updated in a similar way to the Sensor device, just with slightly different inputs.
- Ambient Temperature (must be in celsius)
- Ambient Humidity percentage(this can be decimal unlike the Sensor reading)
{
  topic: "",
  payload: {
    params: {
      thermostatTemperatureAmbient: temp,
      thermostatHumidityAmbient: humidity
  }
}
Also like all Google Home Graph updates, Please only send status updates when the state changes, use an RBE node if needed to filter out duplicates
Questions
If you have questions please ask them in the